
Posted this in Tech lounge but decided to add it here as well.
Purpose: Lower IATs, Better Direct Air Flow, Cheap OTRCAI
Reasons:
Didn't have money for Svede OTRCAI at the time.
LS1 maf is damaged / descreened and often fails.
Using lingenfelter CAI without hood liner I am seeing IAT 143ºF while not in motion.
My GTO:
Rather than listing EVERY modification, I'll keep it simple.
LS1 A4
cam, udp, kooks LTs, kook mids, stock 05 catback exhaust, performabuilt stage 2 trans, 3400 stall, hendrix 1 inch shorter radiator
Supplies and Cost:
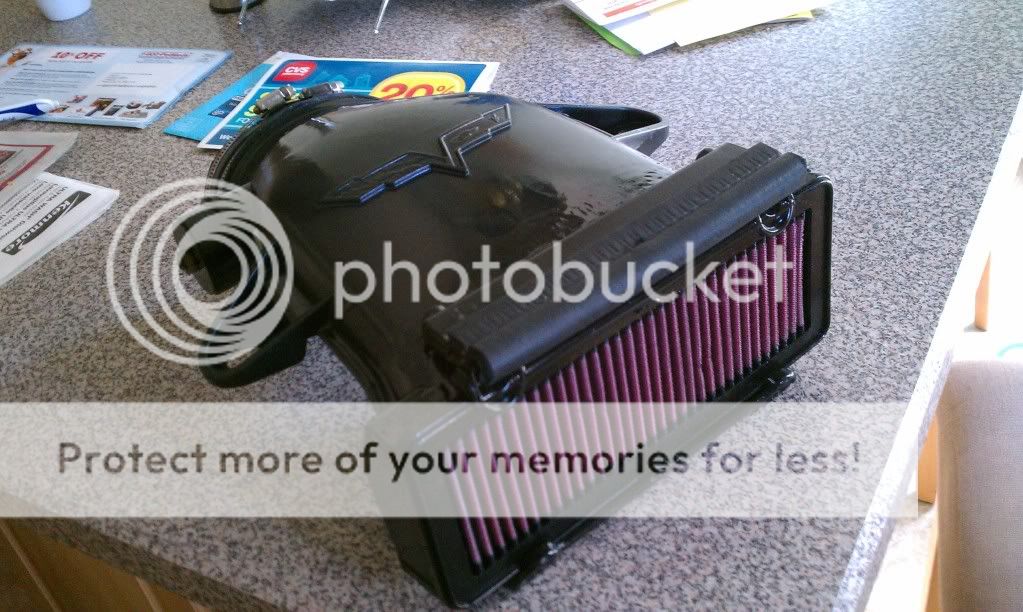
$35.00 for c6 intake
$38.00 for filter
$80.00 for ls3 maf
$26.00 for adapter harness
$10.00 for cheap solder gun and 4" plastic pipe
$5.00 for coupler with clamps
$10.00 for paint
$15.00 for reflectix
You could do it for cheaper if you go SD tune and cap off the ls3 maf card slot.
Process:
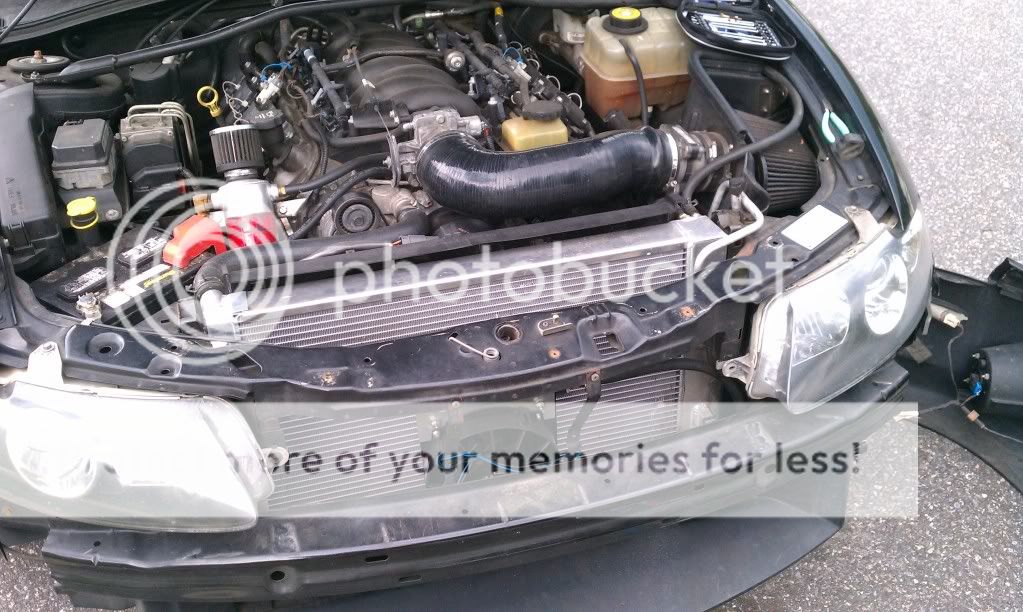
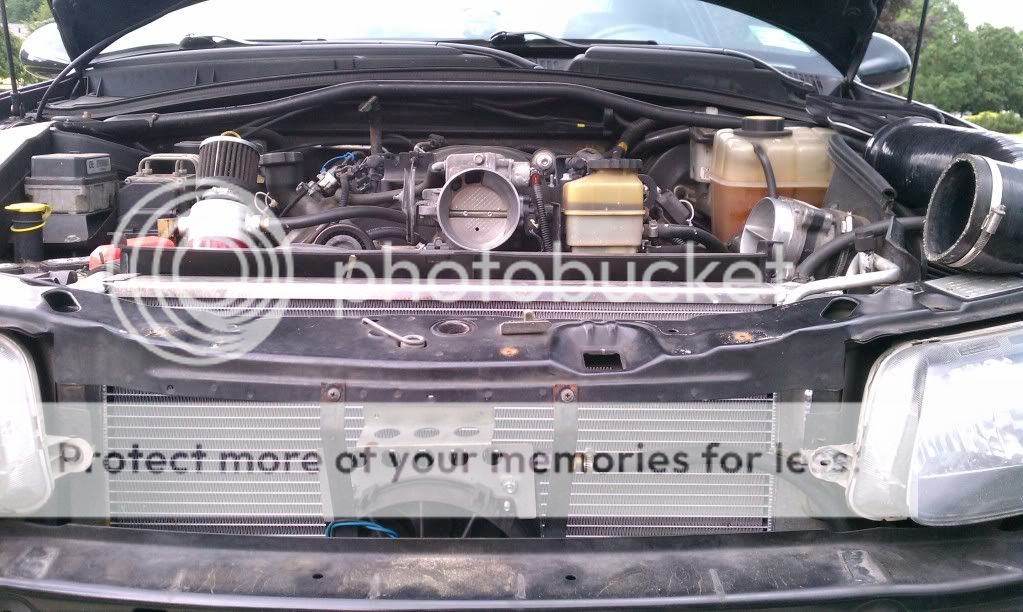
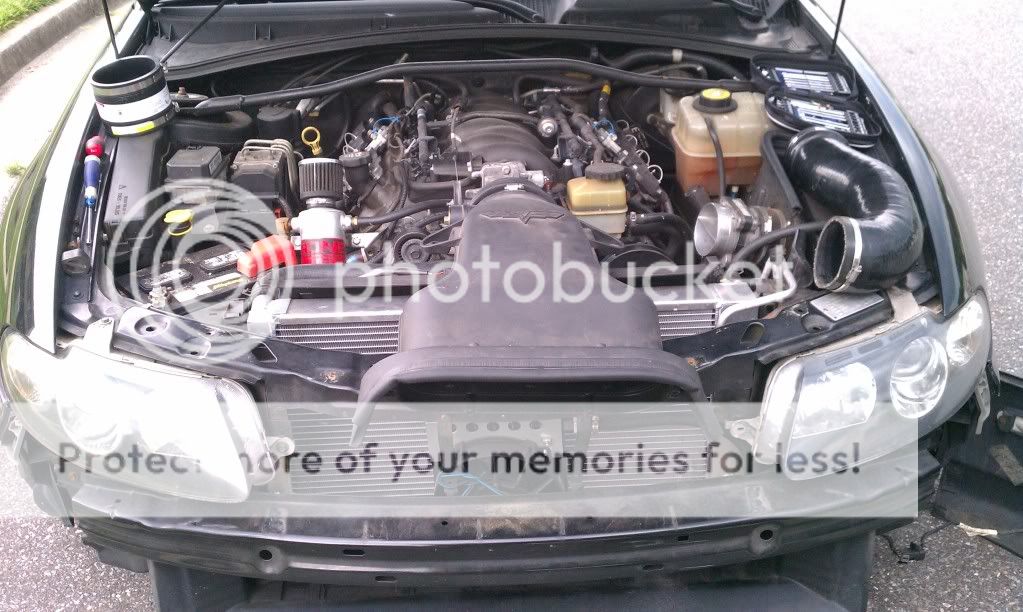
First assess the space I had to work with.
![Image]()
![Image]()
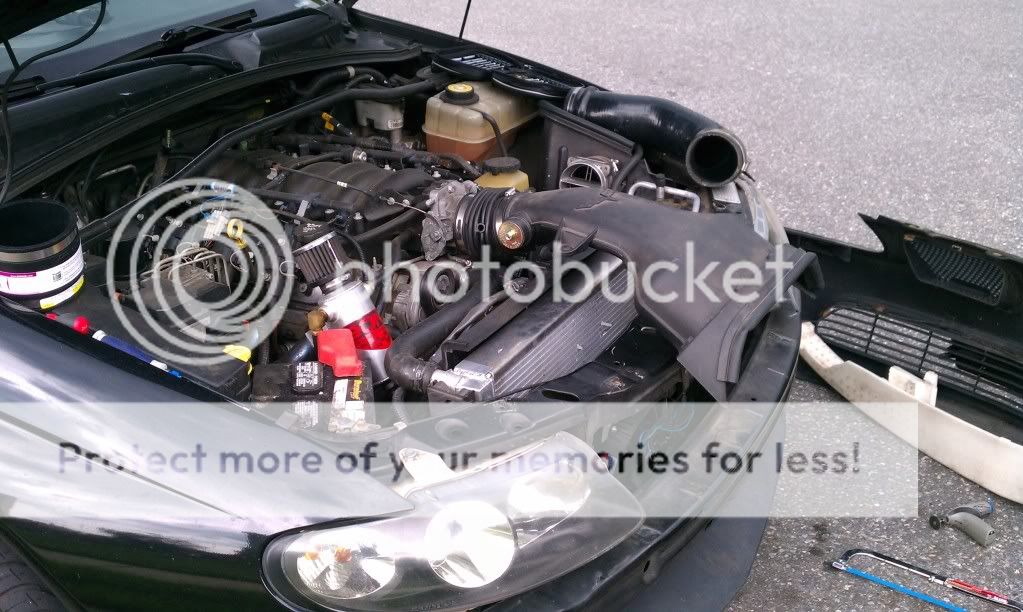
You may notice the lack of an ac condensor, the hard line was cut, not sure when / how it happened but it was, so I took the ac condensor out and I've repaired it and it will be going back in.
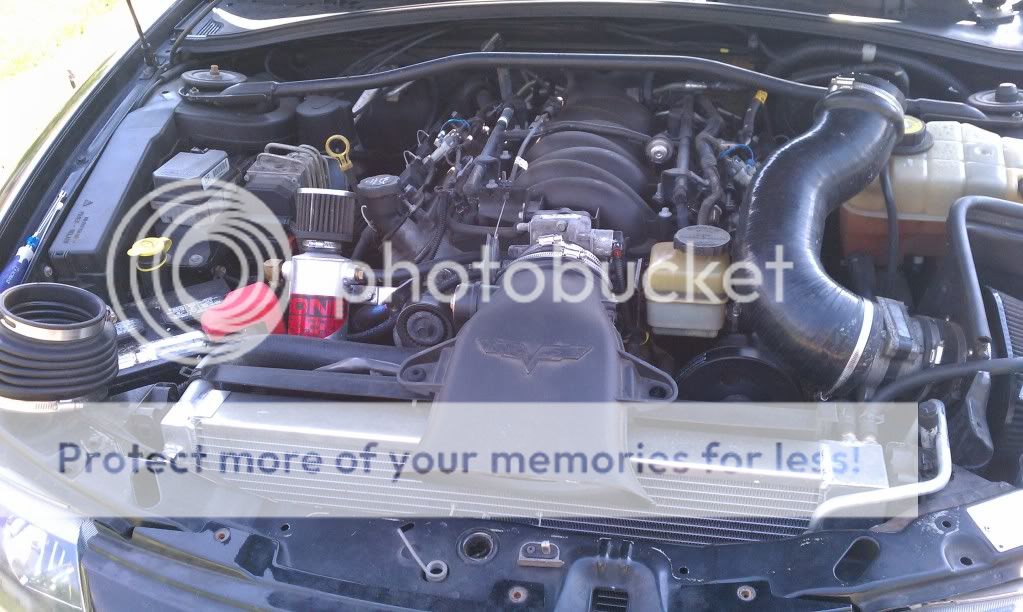
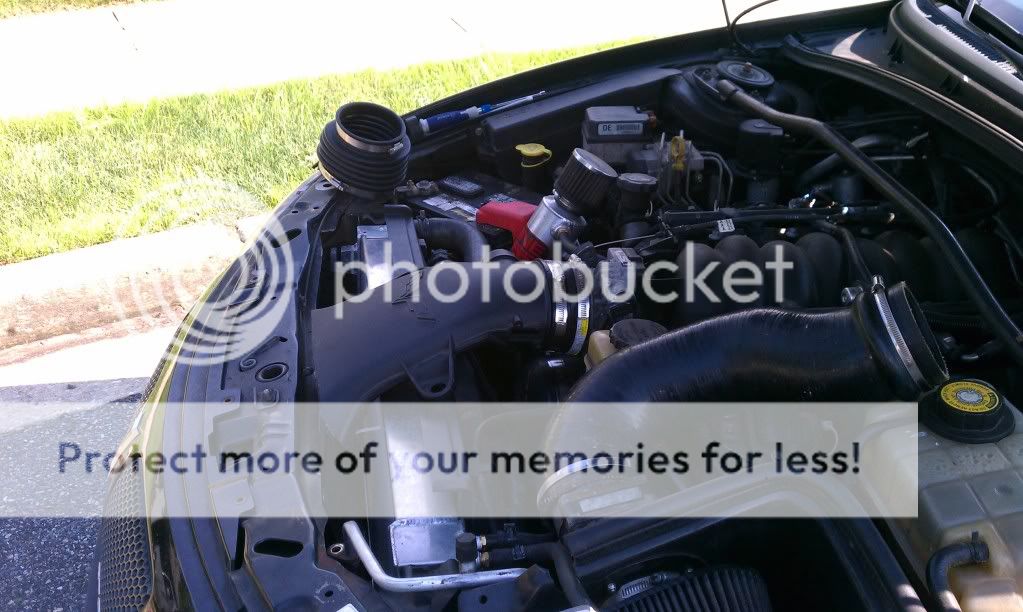
Slap on the c6 intake, cut a hole in the hood and you're good to go! Heh if only. . .
![Image]()
![Image]()
![Image]()
![Image]()
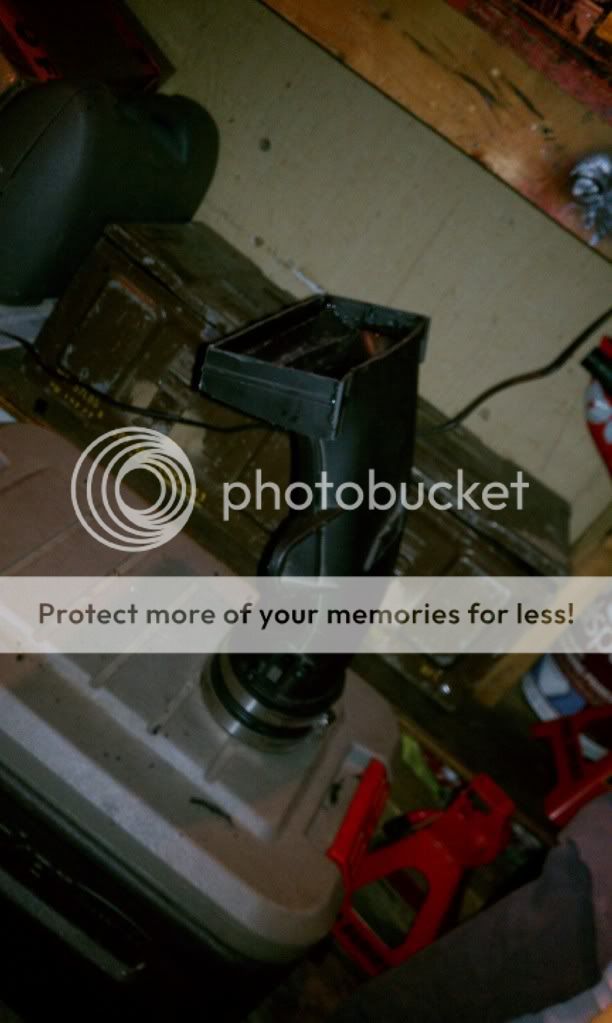
Finally trimmed it to fit. Was hoping with my shorter radiator I could get the air bridge to clear the gap between the hood latch and radiator but unfortunately that didn't work so trimming it down was necessary.
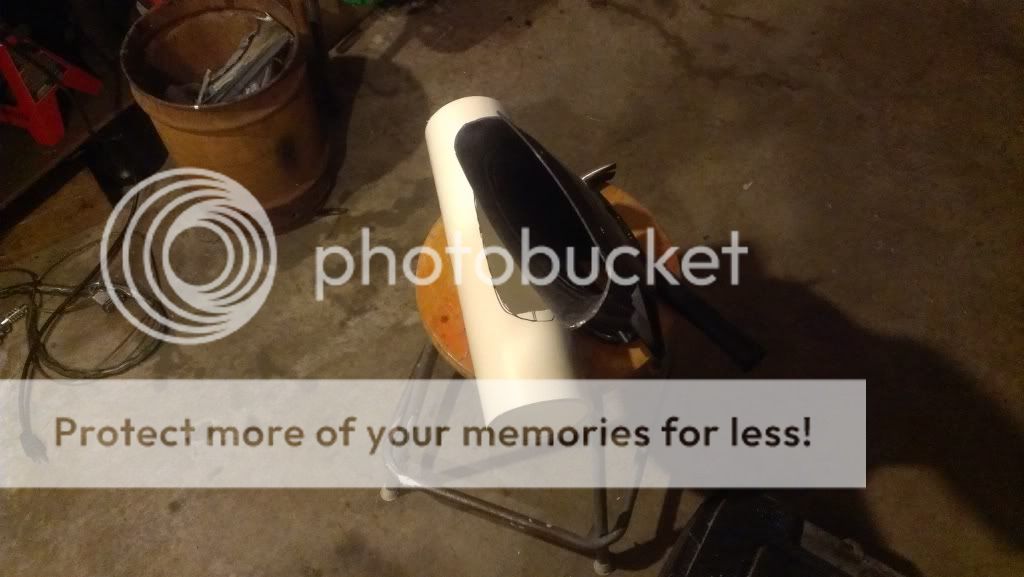
Originally I epoxied all the trimmed pieces of plastic to form an air box for an air filter on the front of the air bridge. Unfortunately this had 2 major flaws. The filter was too small and restricted air flow at high rpms (difference of 13 rwhp) and "plastic epoxy" didn't bond well as I hoped to plastic. You think it would, but it didn't.
![Image]()
![Image]()
Keeping true to the overall goal, I needed a cost effective solution.
IBM05GTO told me about "plastic welding", turned out to be FAR better than using tubes of epoxy. So the solution turned out to be:
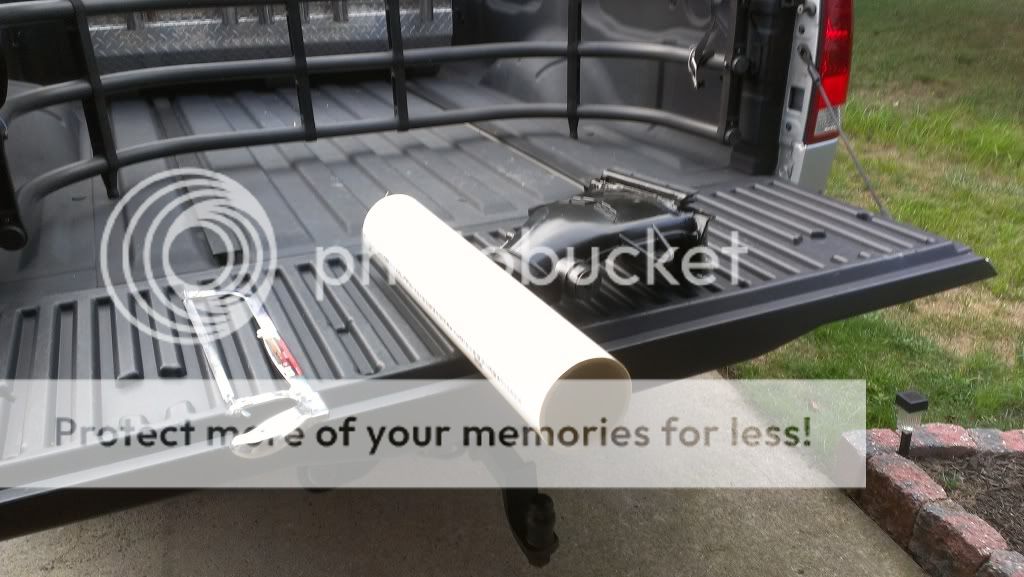
$5.00 4" pipe from home depot and $5.00 soldering iron
![Image]()
Cut a oval-ish hole in the 4" pipe to match the c6 air bridge. Then I removed all the epoxied on pieces I had previously built for holding on the small filter. Then I cut a curve on the opening of the air bridge to match the curve of the pipe. Also I cut the pipe in half with a hacksaw. (To help keep the line straight I drew lines in marker and used my dremel to make a quick groove which I then followed with the hacksaw.) (The dremel I have is the rechargable battery one... I'm impressed it has lasted this long!)
![Image]()
Purpose: Lower IATs, Better Direct Air Flow, Cheap OTRCAI
Reasons:
Didn't have money for Svede OTRCAI at the time.
LS1 maf is damaged / descreened and often fails.
Using lingenfelter CAI without hood liner I am seeing IAT 143ºF while not in motion.
My GTO:
Rather than listing EVERY modification, I'll keep it simple.
LS1 A4
cam, udp, kooks LTs, kook mids, stock 05 catback exhaust, performabuilt stage 2 trans, 3400 stall, hendrix 1 inch shorter radiator
Supplies and Cost:
$35.00 for c6 intake
$38.00 for filter
$80.00 for ls3 maf
$26.00 for adapter harness
$10.00 for cheap solder gun and 4" plastic pipe
$5.00 for coupler with clamps
$10.00 for paint
$15.00 for reflectix
You could do it for cheaper if you go SD tune and cap off the ls3 maf card slot.
Process:
First assess the space I had to work with.
You may notice the lack of an ac condensor, the hard line was cut, not sure when / how it happened but it was, so I took the ac condensor out and I've repaired it and it will be going back in.
Slap on the c6 intake, cut a hole in the hood and you're good to go! Heh if only. . .
Finally trimmed it to fit. Was hoping with my shorter radiator I could get the air bridge to clear the gap between the hood latch and radiator but unfortunately that didn't work so trimming it down was necessary.
Originally I epoxied all the trimmed pieces of plastic to form an air box for an air filter on the front of the air bridge. Unfortunately this had 2 major flaws. The filter was too small and restricted air flow at high rpms (difference of 13 rwhp) and "plastic epoxy" didn't bond well as I hoped to plastic. You think it would, but it didn't.
Keeping true to the overall goal, I needed a cost effective solution.
IBM05GTO told me about "plastic welding", turned out to be FAR better than using tubes of epoxy. So the solution turned out to be:
$5.00 4" pipe from home depot and $5.00 soldering iron
Cut a oval-ish hole in the 4" pipe to match the c6 air bridge. Then I removed all the epoxied on pieces I had previously built for holding on the small filter. Then I cut a curve on the opening of the air bridge to match the curve of the pipe. Also I cut the pipe in half with a hacksaw. (To help keep the line straight I drew lines in marker and used my dremel to make a quick groove which I then followed with the hacksaw.) (The dremel I have is the rechargable battery one... I'm impressed it has lasted this long!)